Sunday, August 24, 2008
It's been so loooong!

Thursday, June 19, 2008
July Challenge

Wow, I've finished my challenge card early! No procrastinating here. Except my craft area is a total disaster and I'm just not in the mood to clean it up.
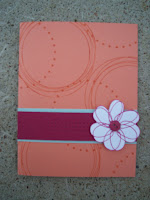
Anyway, the card is a 6x3 inch card in barely banana cardstock. I first trimmed off about 1/4" from the front panel of the banana cs. The scallops were made by punching out certainly celery with the 1/2" circle punch then lining the circles on the back side of the inside cover. If your circles go over the top or bottom edges, just trim them off. Super easy.
The square window was punched using the 1 3/8" square punch. The panel was stamped using the flower from "Happy Heart Day" stamp set (it's a versatile set!) on whisper white cs with certainly celery ink then again with cameo coral on scrap ww. I colored in the heart with cameo coral and punched it out with the 1/2" circle punch. I placed a dimensional on the back and a clear bauble from the make a brad kit. "Thank you" was stamped on the barely banana with cameo coral.
Again, sorry for the poor photo. I've been scanning since I can now confirm my camera just does not take good up close shots. A new digital is on my wishlist! Maybe for Christmas...
Afternoon Tea

Wednesday, June 18, 2008
Stampin' Up!'s New Product Line!
Here's a link to the products and pricing:
http://www.verastamps.com/blog/wp-content/uploads/decorelements_web.pdf
Thursday, June 12, 2008
So Much Groove

Thursday, June 5, 2008
Live Your Dreams
Wednesday, May 28, 2008
Good Ol'Summertime
 My Stampin' Up! upline gave us a challenge: make a project with the inspiration of "Good Ol' Summertime." It didn't take me long to pull out my "Tart & Tangy" stamp set and ink up the strawberries!
The card base is kraft with layers of whisper white and Summer Picnic DSP. I made the photo corners because I don't have the photo corner punch, yet... They are also paper pierced.
The swirls from "Baroque Motifs" was inked in old olive and the strawberries were markered with old olive and real red, then cut and adhered with dimensionals.
Thanks for looking!
Edited 5/29/08:
I was inspired by a card on SCS (as many of my cards are!) to use the swirls and berries. Sorry, I don't have the name of the person who first posted:(
Monday, May 19, 2008
Bright Friend

Friday, May 2, 2008
Sporting Stars
 This is another card from my masculine class. The colors are Blue Bayou, Sahara Sand, Real Red and Whisper White. I wheeled the main panel using the "Classic Stars" jumbo wheel in Real Red ink. The "All Star" is from "Sporting" stamp set and matted with real red cs. The brad on the right side (should be on the lower left) is a build a brad. I just stamped the star from "Sporting" on ww with blue bayou ink and punched out with a 1/2" circle punch.
 These brads are real easy to do and add a neat touch.
I have to tell you I was at a Cricut party this Saturday, thank you Megan, and was that fun! Now I want all of those cartridges. Too bad I have a rubber stamp addiction. I'll need another job to get my Cricut fix!
Thanks for looking!
Wednesday, April 30, 2008
kwerner color inspiration #7

Chocolate Chip, Close to Cocoa, Soft Sky and Very Vanilla.
Check out Kristina's blog by using the link on the right. She is my photographing hero! I like to blame my bad pictures on my camera, but I'm sure it's the user...
Thanks for visiting!
Saturday, April 26, 2008
You are #1
 The photo is crooked but I think you get the idea...
This is another card we did at my masculine card class. I made this one using "Sporting" stamp set, brilliant blue, only orange and whisper white card stock and inks. The "#1" was stamped and then nested on the 3 larger circle punches.
The circles in the background are punched with the 1" circle punch in brilliant blue and then layered. It gives the background some texture and looks really cool on scrapbook pages.
Have a great weekend!
CASE'd Scrap Purse

Thursday, April 24, 2008
Sending Birthday Wishes

Monday, March 31, 2008
Cupcake cutie

Friday, March 28, 2008
Dream Big Color Inspiration

Thursday, March 27, 2008
SCS Challenge SC168 Happy

Flap Fold Flowers

This is my first SCS challenge! The challenge was to make a flap fold card using instructions from the scor-pal website. It's linked through SCS.
I used my coluzzle circle maker and then scalloped the edges with the corner rounder. I didn't have any designer paper with groovy guava in it so I made my own. The whisper white piece is stamped with images from the "Time Well Spent" and colored with a blender pen and ink pads. The large flower is also colored in with blender pens and attached with a crystal brad from the pretties kit. The flap would be better attached using small magnets or even velcro but I had to use Herma temporary dots, that's all I have!
Almost forgot, want to know the colors? Groovy Guava, Rose Red, Blush Blossom and River Rock!
Thanks for looking!
Wednesday, March 26, 2008
Dinosaurs
 It's been so long since I've posted that I forgot my password. That doesn't mean I haven't been stamping! With sale-a-bration done, I'm going to have a little more time.
This card uses "Prehistoric Pals" stamp set. With 2 young boys, I have many kid friendly stamps for cards and scrapbook pages. Cardstock is naturals ivory, chocolate chip, pumpkin pie, so saffron and always artichoke. Inks used are pumpkin pie, so saffron and always artichoke.
Every Wednesday I get a Splitcoast Stampers email with challenges in it. I completed my first 2 today and what fun. I will hopefully get time to post those later. It's free to sign up and suggest you do so! Follow the link to the right to www.splitcoaststampers.com.
Tomorrow I'm going to make time to scrap! It's supposed to snow again, sigh.
Thanks for looking!
Thursday, March 6, 2008
Lemons & Limes

Wednesday, February 27, 2008
Cheery Cherries
Small gift bag

Friday, February 22, 2008
Gavin's 7th Birthday

Monday, February 18, 2008
Inspiration
Just wanted to let you know where I get some of my inspiration. I frequent other blogs (hence, why I started my own) on a frequent basis. I will be posting the links on the right hand side of my blog. I think this is bloglitically correct?
Anyway, there is a lady who actually works for Stampin' Up! and posts a "Make a Card Monday" video. She has some great tips (especially today) on punches and shows how to use a Stamp-a-ma-jig. Her link is www.kwernerdesign.com/blog/ Hope this works!
Also, there is a link to a feedblitz on the right hand column. You can enter your email address and the service will email you when I have a new post. Only if you are interested, not sure if there is any spam involved so don't use your office/work email!
This weekend is the Mount Morris retreat. I will be at the Arrowhead Lodge Saturday morning to scrap all day and into the night. See some of you there!!! If you have never been to a scrapbooking/stamping weekend, you have to do it. There are great people to meet, ideas to gain and fellowship to enjoy.
Thanks, Melinda
Tuesday, February 5, 2008
Sympathy
 I am really liking the bashful blue and chocolate chip color combination lately. This is a sympathy card using the "Close as a Memory" stamp set. It has 3 beautiful verses and the flowers shown above.
 The rest of the card uses mellow moss, whisper white, chocolate chip cs/ink, hodgepodge hardware, chocolate taffeta ribbon and pewter brads.
Monday, February 4, 2008
More Snow?

I'm sure we're all a little tired of the massive amounts of snow this winter, but this is the pretty kind of snow!
This card uses the "Snow Flurries" stamp set; bashful blue cs and ink, shimmer white cs, chocolate chip ink, chocolate taffeta ribbon and the hat pins/beads from the "Pretties Kit."
This would make a perfect thank you for that snow plow driver!
Masculine Valentine

Wednesday, January 30, 2008
A Little Birdie Told Me...
 I decided to post this card I made last week because it seems cheery to me. Hopefully this extremely cold weather is out of here very soon.
This card uses Stampin' Up!'s, "A Little Birdie Told Me" stamp set, old olive, tempting turquoise and whisper white cardstock; bali breeze designer paper. The medallion in the lower right corner was made using the 2 larger circle punches and the scallop circle punch.
Thanks for looking and I hope spring is soon on it's way!
Friday, January 25, 2008
Happy Heart's Day
 This is another card using the "Happy Heart Day" stamp set. The main panel is colored in with Stampin' Up!'s Watercolor Wonder Crayons, Rich Regals and neutral then blended with a blender pen. A bead is adhered to the flower and the scallop was made using the corner rounder punch. Just CAREFULLY take off the plastic guide and line up the corners.
 Thursday, January 24, 2008
Quilted card
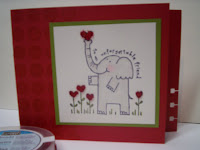
Elephant Valentine

This card uses the new stamp set from Stampin' Up! called "Happy Heart Day." It's included in a promotional bundle for January 2008. I also used the new colored micro beads on the hearts. The new tombow (r) adhesive works great for adhering the beads.
The elephant was colored using the Watercolor Wonder Crayons from Stampin' Up!, the neutrals pack.
Saturday, January 5, 2008
Good Thing
It's a New Year


